Monday, April 25, 2016
Tuesday, April 19, 2016
We will go over this in class
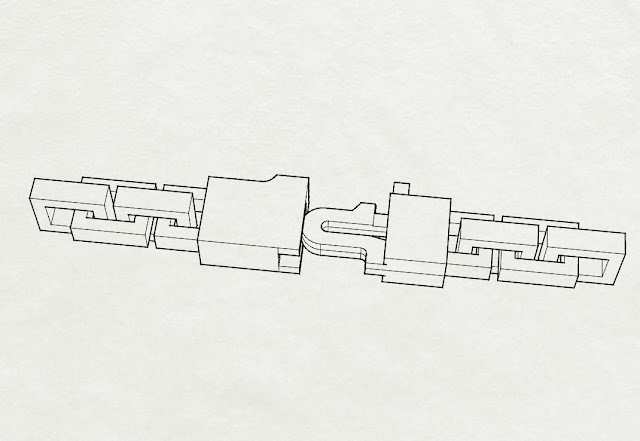
I would like to make today mostly a workday but I wanted to measure and digitize the brooch backs together after Brian's demo. When we get back to lab, we will do the brooch back, then a little Sculptris then Zbrush. The remaining time will be dedicated to looking over your designs and getting started.
I want to do a soft intro to Zbrush. Honestly, we will not be able to cover this software in its entirety. There is just not enough time. Zbrush is a beast. I will how ever show you how to generate privatives to import into both Rhino and Sculptris. We should be getting our Form2 printers in soon and there will be a last minute option to print a piece on them. This piece could be generated in Zbrush and pushed through Rhino for scale. I will go over this step by step in class.
1. When you first open Zbrush the Lightbox opens. Imagine Lightbox as being a folder with icons but what is displayed are tools, basic shapes, and sample models.

2. Light box will always stay open unless you hide it. Simple click on the button for Lightbox to hide it.

3. Zbrush is odd. It is very different than most of the software we have used in class. For example, the items in the lightbox are called tools or Ztools. These tools can be geometric shapes. One the right hand side right click the gold S. In the flyout toolbar click on the Ring icon.

4. It is import to do the next few steps in order. First, with the ring tool selected, left click and drag on the gradient background. This will place a ring in the work-area. Before you do anything else click EDIT in the upper toolbar.

5. You will now notice that the tool duplicated itself in the mini lightbox menu on the right hand side of the screen. If you right click drag on the gradated background you can rotate your object. A few pro tips here:
Right click drag on the background rotates
CTRL>Right click drag Zooms
ALT>Right click drag pans

6. In order to lock in your orientation and to make alterations to the geometry of the ring you must click MAKE POLYMESH3D. Again, you will notice that you have made a copy of the Ztool in the mini light box.

7. After making it a PolyMesh you can now drop expand the deformation tab and make changes. This is a way of changing your geometry with some level of accuracy. Remember that organic modeling is often based on haptics (is the science of applying touch (tactile) sensation and control to interaction with computer applications) Basically you can sculpt all day but if you want to scale, rotate, inflate evenly you need to do that in the deformation tab. You will notice small x, y, zs above the slider bars. This determines the orientation of the deformation. Try highlighting just the Y on the size slider and making a barrel ring.

8. Now try sliding the inflate slider to the left (negative) this will essentially deflate your ring

9. I would encourage you to experiment with these sliders. You can get some unique geometry that you cannot get in Sculptris or Rhino. Once you have a grip on deformation expand the geometry tab. Zbrush is strangely linear. Your polygon count can go up and down anytime that you are modeling. To increase you polycount, click divide. To lower it you can click lower res. By dividing a number of times you can edit between divisions but clicking lower res and higher res. If you want to go lower than the lowest division click Reconstruct Subdivisions


10. In the upper tool bar you will notice that you are in DRAW mode. To the right of the DRAW icon there is MOVE, SCALE, ROTATE. If you select one of these modes, you can drag out an edit bar by left clicking on your object and dragging. The edit bar is a line with three circles on it. If you click and drag the outside circle it alters the geometry. If you click drag the inner circle it constrains it. In my mind it is similar to holding down the shift key when you scale with the gumball in Rhino. You will actually notice that the colors and symbols are the same as the gumball in Rhino. These colors will give you hints as to which direction the geometry will move.


11. If this 3D space is disorienting that is because it is. You can turn on the Floor and you will have a "construction" plane that can help orient things.

Once you are done editing your tool you can export an OBJ file that you then can import in to either Rhino or Sculptris.
I want to do a soft intro to Zbrush. Honestly, we will not be able to cover this software in its entirety. There is just not enough time. Zbrush is a beast. I will how ever show you how to generate privatives to import into both Rhino and Sculptris. We should be getting our Form2 printers in soon and there will be a last minute option to print a piece on them. This piece could be generated in Zbrush and pushed through Rhino for scale. I will go over this step by step in class.
1. When you first open Zbrush the Lightbox opens. Imagine Lightbox as being a folder with icons but what is displayed are tools, basic shapes, and sample models.
2. Light box will always stay open unless you hide it. Simple click on the button for Lightbox to hide it.
3. Zbrush is odd. It is very different than most of the software we have used in class. For example, the items in the lightbox are called tools or Ztools. These tools can be geometric shapes. One the right hand side right click the gold S. In the flyout toolbar click on the Ring icon.
4. It is import to do the next few steps in order. First, with the ring tool selected, left click and drag on the gradient background. This will place a ring in the work-area. Before you do anything else click EDIT in the upper toolbar.
5. You will now notice that the tool duplicated itself in the mini lightbox menu on the right hand side of the screen. If you right click drag on the gradated background you can rotate your object. A few pro tips here:
Right click drag on the background rotates
CTRL>Right click drag Zooms
ALT>Right click drag pans
6. In order to lock in your orientation and to make alterations to the geometry of the ring you must click MAKE POLYMESH3D. Again, you will notice that you have made a copy of the Ztool in the mini light box.
7. After making it a PolyMesh you can now drop expand the deformation tab and make changes. This is a way of changing your geometry with some level of accuracy. Remember that organic modeling is often based on haptics (is the science of applying touch (tactile) sensation and control to interaction with computer applications) Basically you can sculpt all day but if you want to scale, rotate, inflate evenly you need to do that in the deformation tab. You will notice small x, y, zs above the slider bars. This determines the orientation of the deformation. Try highlighting just the Y on the size slider and making a barrel ring.
8. Now try sliding the inflate slider to the left (negative) this will essentially deflate your ring
9. I would encourage you to experiment with these sliders. You can get some unique geometry that you cannot get in Sculptris or Rhino. Once you have a grip on deformation expand the geometry tab. Zbrush is strangely linear. Your polygon count can go up and down anytime that you are modeling. To increase you polycount, click divide. To lower it you can click lower res. By dividing a number of times you can edit between divisions but clicking lower res and higher res. If you want to go lower than the lowest division click Reconstruct Subdivisions
10. In the upper tool bar you will notice that you are in DRAW mode. To the right of the DRAW icon there is MOVE, SCALE, ROTATE. If you select one of these modes, you can drag out an edit bar by left clicking on your object and dragging. The edit bar is a line with three circles on it. If you click and drag the outside circle it alters the geometry. If you click drag the inner circle it constrains it. In my mind it is similar to holding down the shift key when you scale with the gumball in Rhino. You will actually notice that the colors and symbols are the same as the gumball in Rhino. These colors will give you hints as to which direction the geometry will move.
11. If this 3D space is disorienting that is because it is. You can turn on the Floor and you will have a "construction" plane that can help orient things.
Once you are done editing your tool you can export an OBJ file that you then can import in to either Rhino or Sculptris.
Tuesday, April 12, 2016
CTRL CLICK ON OBJECT TO PAINT ON MASK
CTRL CLICK OFF OF OBJECT TO REVERSE MASKING
CTRL DRAG WINDOW TO RELEASE THE MASKING
CTRL D TO MASK ALL
CTRL ALT PAINT TO REMOVE MASKING
SHIFT SCROLL TO REDUCE BRUSH SIZE
CTRL SCOLL TO ADJUST STRENGTH OF TOOL
ALT RIGHT CLICK DRAG TO MOVE
DONT FORGET ABOUT SYMMETRY!!!!
WATCH YOUR POLYGON COUNT (20,000 IS THE NUMBER, IT CAN BE LARGER BUT....)
MOVE BACK AND FORTH MODELING BETWEEN LOW POLY COUNT AND HIGH POLYCOUNT
LOW POLY COUNT TO ROUGH OUT SHAPES
HIGH POLY COUNT FOR DETAILS
Files:
All files should be named in this format: name+project+object
for example:
arthurrollingstonering.3dm
Also, please make sure to label the file as final or WIP (work in progress)
This will ensure that we are printing the correct file
Files should be located in the proper folder
LIKE A ROLLING STONE files should be in the LIKE A ROLLING STONE
RENDERS files should be in the RENDERS folder
NECKIT files should be in the NECKIT folder
Please upload your renders to the render folder. Again, all the files should be labeled
name+project+version
for example:
arthurneckitspecdrawing.jpg
arthurneckitrender.jpg
Please make sure you have uploaded all of your files
PROJECT #3!!!!
Is the selfie just a Digital Cameo?
Assignment brief:
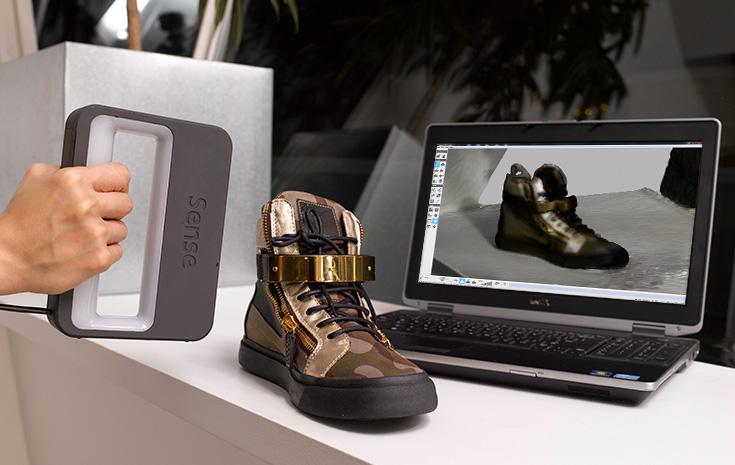
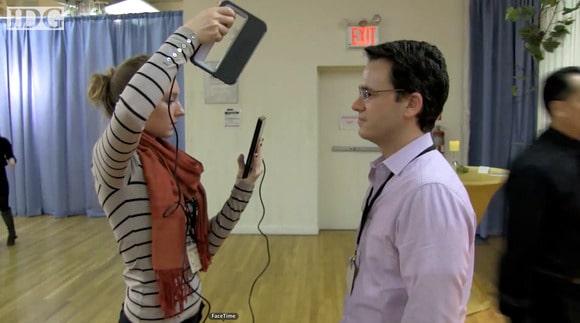
Using the 3D systems Sense
scanners, Rhino and Sculptris capture geometry and edit it to fit a supplied
brooch back. The subject matter can be narrative or
self-reflective but must use a portion of your body. These brooches will be put on display in the
hallway of J&M. Parts will be printed using the Form 1, Dimension or
Shapeways.
Learning
outcomes:
Students will learn advanced organic modeling techniques using
Sculptris to edit 3D scan
data in order to make a self portrait style brooch.
Skills
list:
Sculptris/
Pixelogic’s stand alone organic modeling software
Measuring and modeling to fit
polygonal geometry to meet hard surface geometry.
Learn
3D scanning using the 3D systems handheld 3D scanner.
Using
stone setting techniques to set unusual material
Translating
real life measurements into a digital environment and then outputting it to a
3D printer.
Concept:
Creating
a wearable “cameo” with 3D scan data.
Research:
MRI, X-ray, 123D catch, Cameos, Self
portrait project, Chuck Close, explore the possibility of the “wearable me”
Questions:
How can 3D scan data help
support conceptual content in work?
Does translating the real into
virtual change how what is scanned perceived (icon/avatar of yourself)?
Once your likeness is digitized is it yours?
What are other uses for 3D scanning in wearable work?
What
role does identity play in your piece?
Expectations:
A wearable piece that takes advantage
of 3D printing and 3D scanning technology to include geometry that is relevant to
conceptual content. Tests and mock-ups are required. Multiple prints may need to be
made in order to fit print to brooch back. With this and all projects for
this course renders and spec drawings are to be turned in.


Subscribe to:
Posts (Atom)